How to Decorate a Cake Like a Professional at Home

Decorating a cake isn’t as difficult as it looks. With the right tools, a bit of practice, and a few simple tricks, you can make your homemade cake look like it came straight from a bakery. Here’s a step-by-step beginner’s guide to mastering the art of cake decoration.
1. Prepare Your Cake Properly
Start only after your cake has completely cooled. If you apply cream on a warm
cake, it will melt and ruin the texture. Apply a thin layer of frosting (called
a crumb coat) and refrigerate it for 15–20 minutes to lock in crumbs and
create a smooth base.
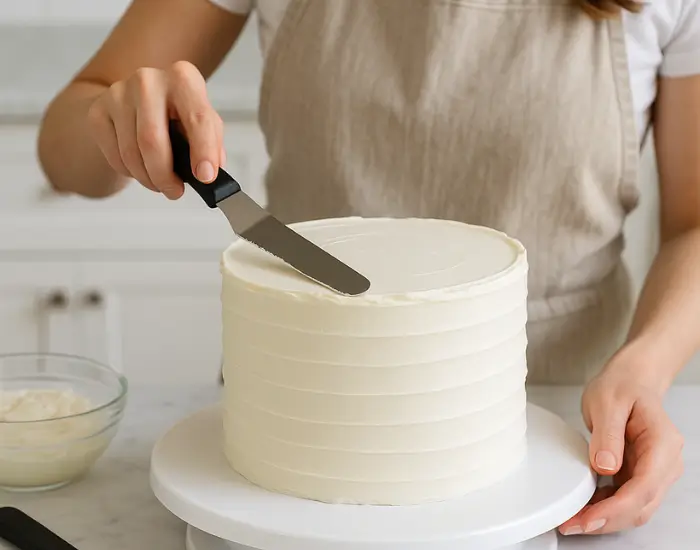
2. Smooth the Base Layer
Add your final coat of frosting and use a palette knife or flat spatula to
smooth it evenly. If you have a cake turntable, it makes this step easier. Keep
rotating the cake gently while leveling the sides for a professional finish.
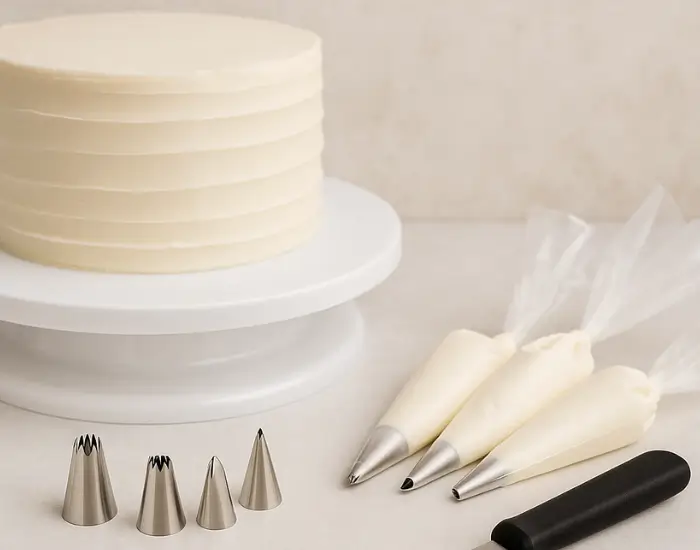
3. Gather the Right Tools
You don’t need expensive tools, just the essentials:
- 1
Turntable
- 1
Offset spatula
- A
few piping nozzles (star, round, leaf)
- 2–3
piping bags
These basics are enough to create clean and attractive designs.
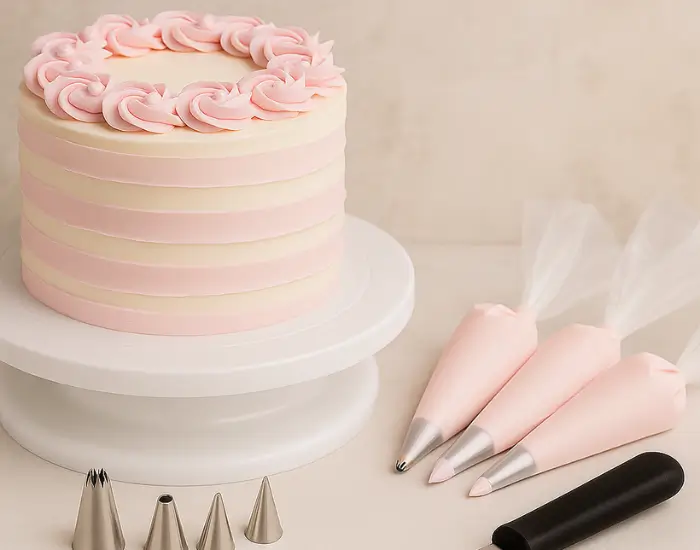
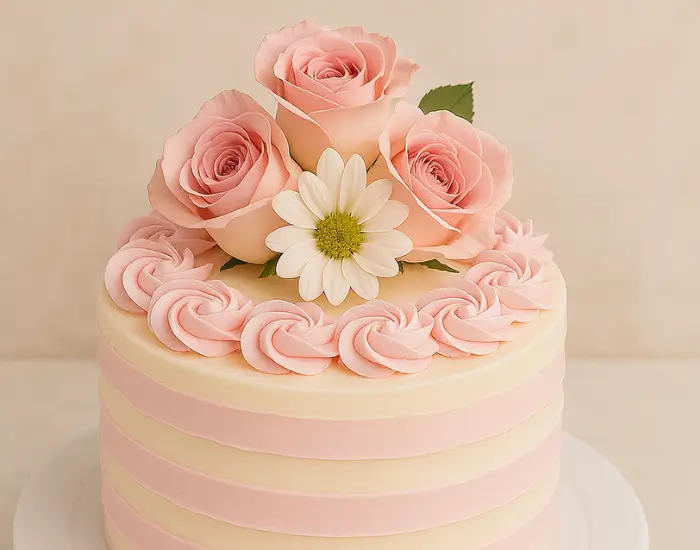
4. Practice Basic Piping Designs
Piping is the heart of decoration. Practice on a plate before applying it to
your cake. Start with two classic designs:
- Rosettes
(flower-like swirls)
- Shell
borders (along the edges)
Keep your frosting slightly thick for clearer patterns.
5. Choose a Theme and Color Combination
Avoid random colors—choose one main shade and one complementary tone. For
example, pink & white, yellow & white, or blue & white. Match it
with the occasion, such as birthdays, anniversaries, or kids’ themes.
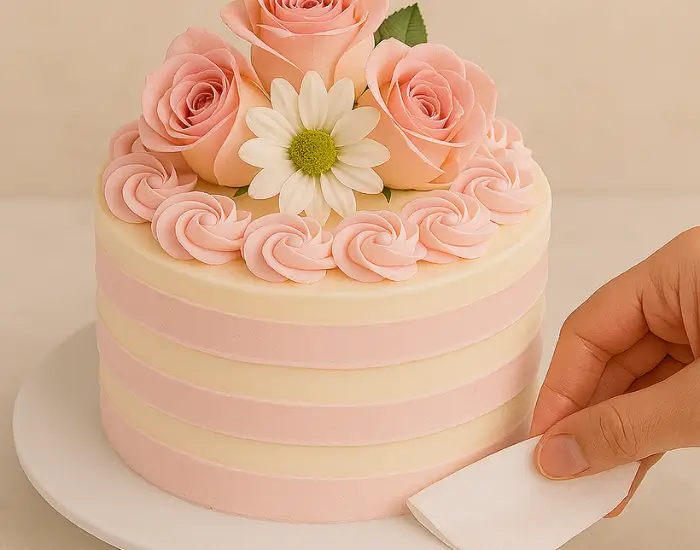
6. Add a Centerpiece or Topper
Every cake should have a focal point. This could be fresh flowers, cherries,
chocolate garnish, or an acrylic topper. A defined center instantly adds
elegance and balance.
7. Keep the Edges Clean
Once decorated, clean any excess frosting from the cake board with a tissue or
clean spatula. This small step makes a big difference in presentation.
8. Add Final Details
A few finishing touches can make your cake stand out:
- Dust
cocoa powder or edible glitter
- Add
chopped nuts or choco chips along the sides
- Create
a drip effect using melted chocolate
These subtle details give your cake a premium bakery-style finish.
9. Store It Correctly
After decorating, refrigerate the cake for at least 30 minutes so it sets
properly. Before serving, take it out 10–15 minutes earlier to bring it to room
temperature.
Pro Tip – Blue Heaven Style
Always beat chilled whipping cream and decorate in a cool environment. It keeps
the frosting firm and the designs sharp.
Conclusion
Cake decoration isn’t about perfection—it’s about sequence and patience.
Bake → Cool → Crumb coat → Final coat → Piping → Centerpiece → Clean edges.
Follow this simple process a few times, and your home cakes will start looking
like professional bakery creations in no time.
If you loved decorating, take your skills further with our How to Frost a Cake Like a Pro — a complete guide to mastering smooth finishes and perfect swirls
Related Products

1 Comment(s)
Hello! I simply would like to give you a big thumbs up for your great information you have right here on this post. I'll be returning to your site for more soon.
Hi! Thank you so much for your kind words. I’m really glad you found the information helpful. We’ll keep sharing more useful tips and guides — hope to see you again soon!
Share Your Thoughts